3.2 Creating a New Booking
The first way to create a booking is for the professional to generate the booking. This may be based on communicating via direct messaging with a customer directly in Critter, or via another forum where professional capture booking requests. Selecting the "+" sign in the upper right hand corner will open the window to create a new booking.
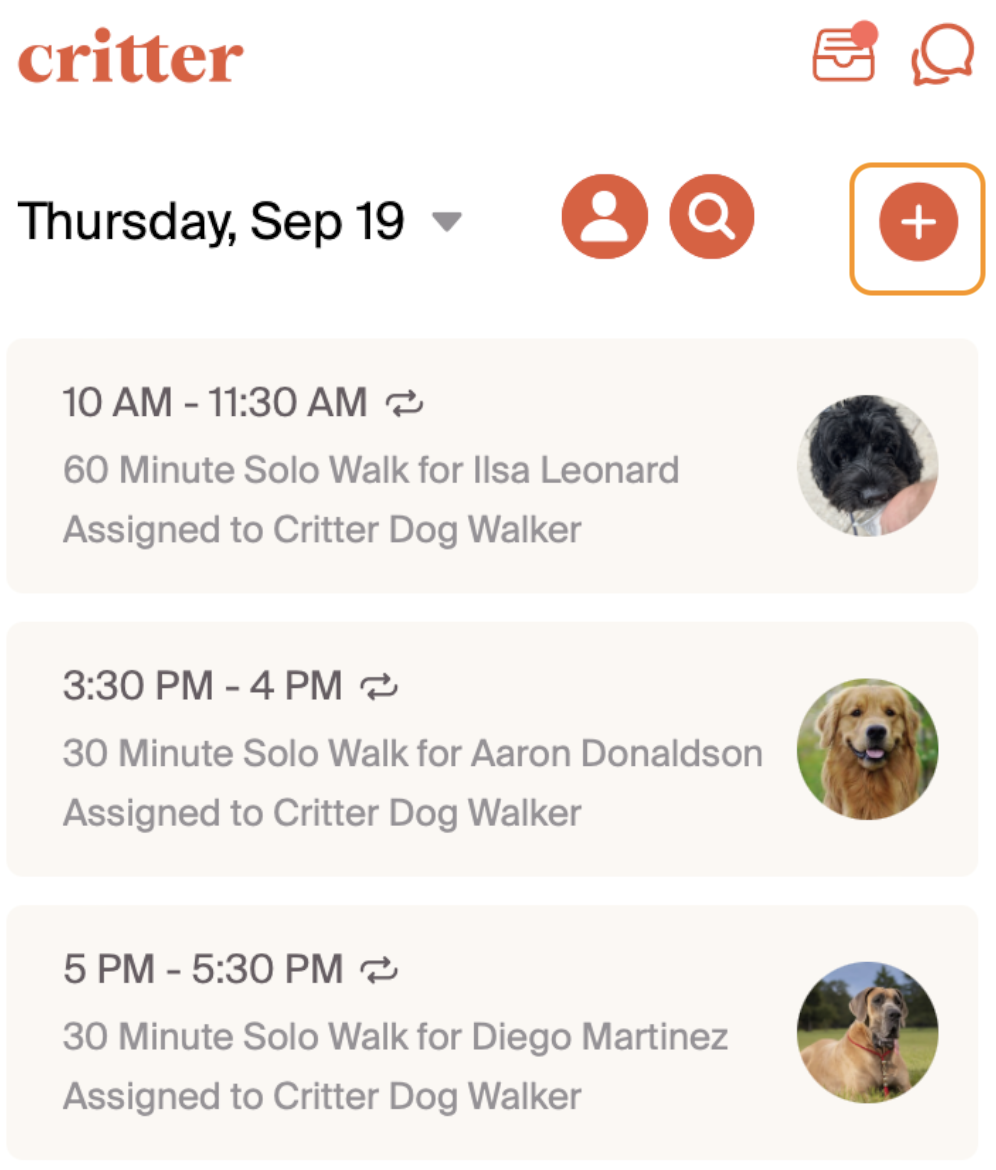
When the create booking window opens, the first step is to select the time. This time will be for the time zone that you work in. If you create bookings using time blocks, we suggest using this start and end to assign the time block. If this is an all day booking, select the "all day service" checkbox and this will create the booking for a 24 hour window. In the next section, we will go through what it looks like to create a repeat service.

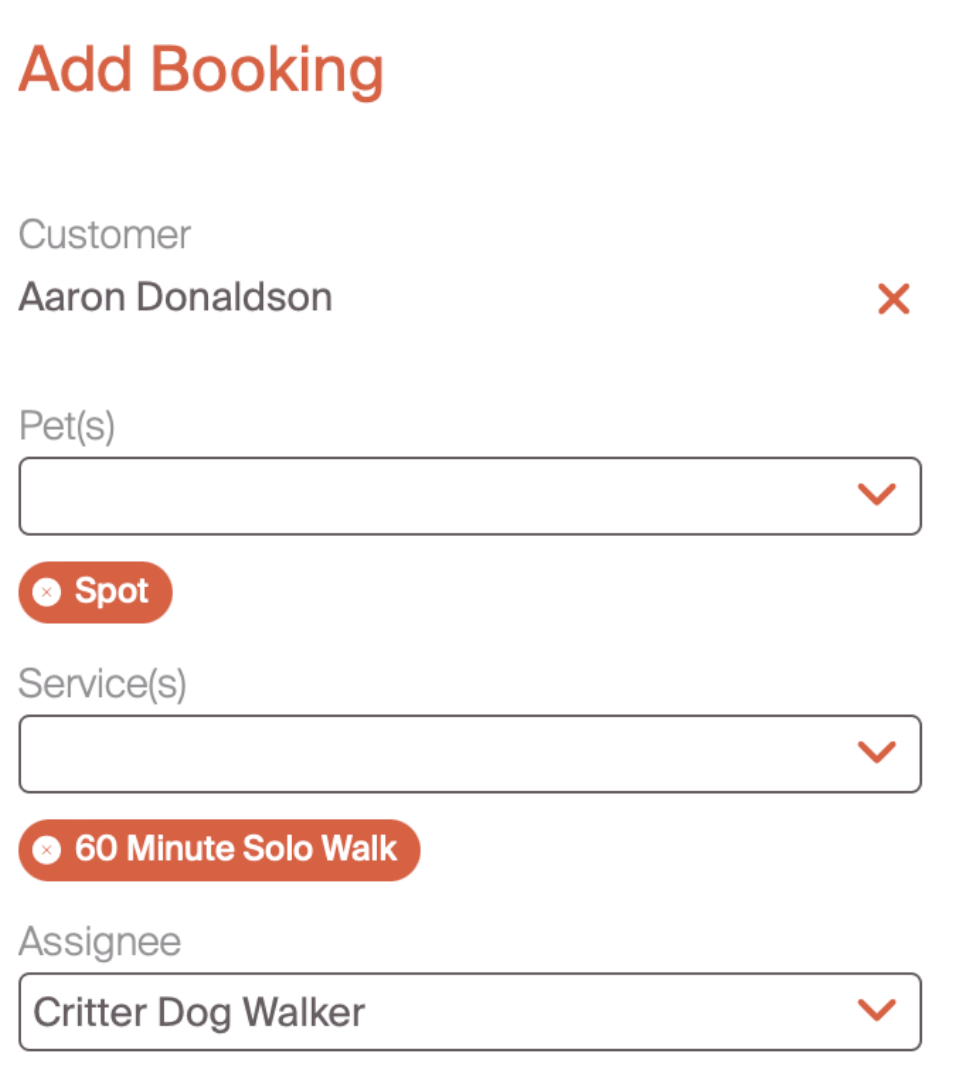
Following the time slot, professionals are prompted to include key customer, pet, service, and employee information. The first step is to select the customer. Once a customer is selected, the pets assigned to that customer will be available in the drop down. Selecting the relevant service is critical as this will link the booking with a service. By doing so, we will simply the invoice process. Finally, if you have more than one employee, use the assignee field to choose which employee will deliver the service.
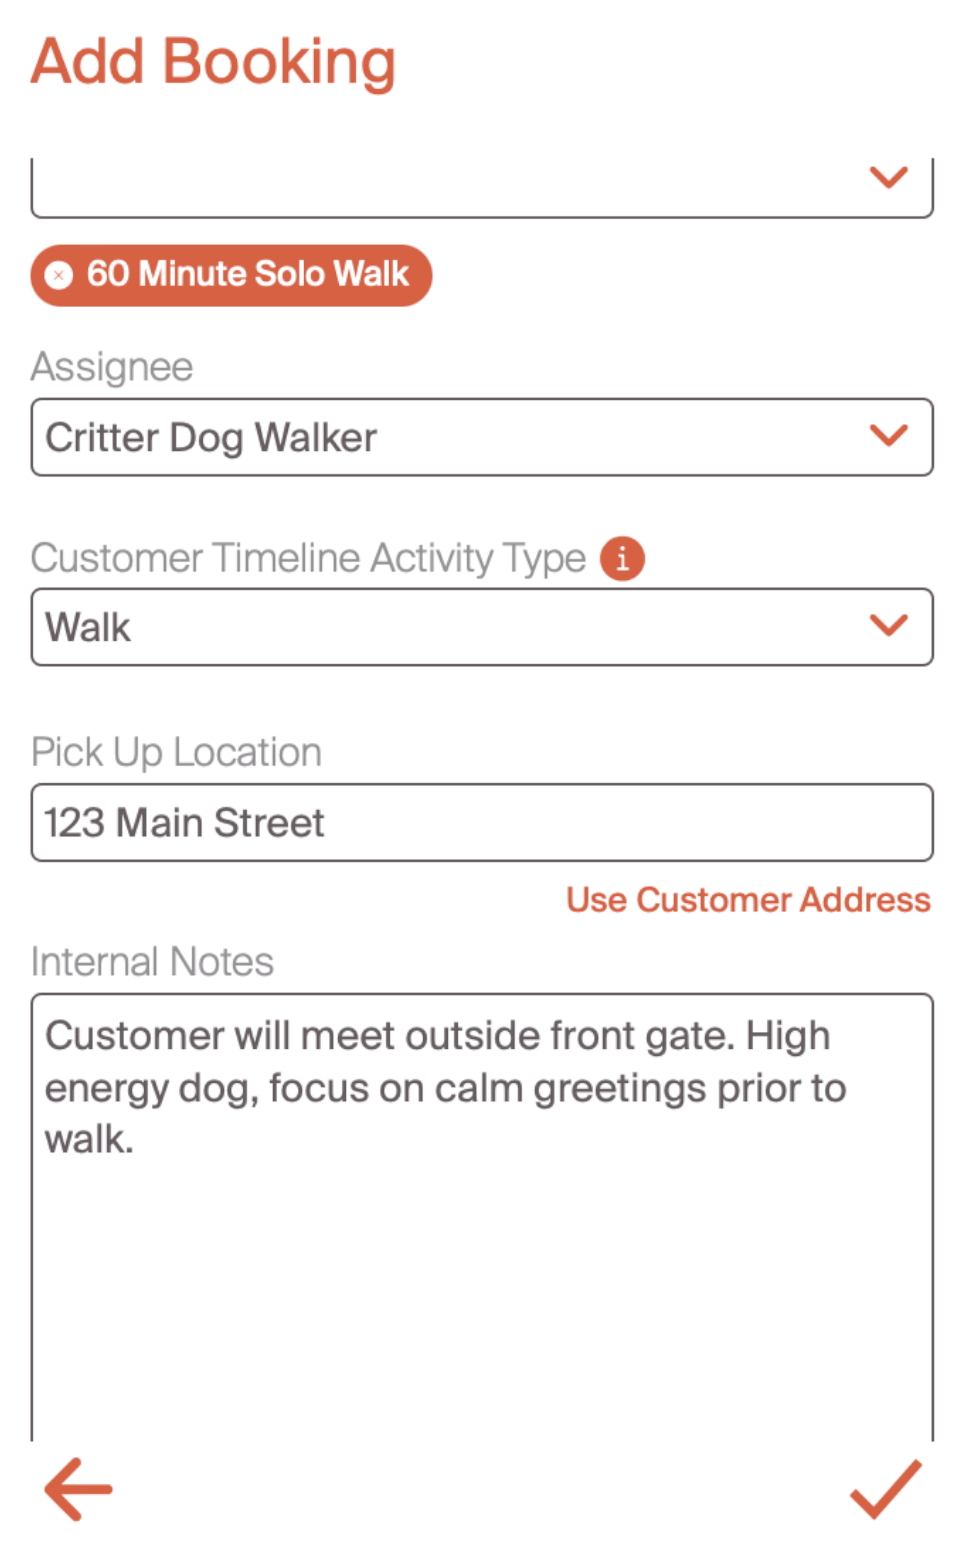
The last steps of the booking process complete the information to generate a customer activity, confirm a relevant pickup location, and include any internal notes that you may want. The customer timeline activity is important as this is the activity type that will appear on the timeline when you complete a service report. We'll discuss the service report a bit later in the section. In the pick-up location, you can select "use customer address" if a customer provides a home address in their profile. This is an optional field, and can be omitted if not relevant to the service. Lastly, internal notes is another option field. We see professionals use this to include key notes, or leave messages for employees to review in the booking. When all pertinent fields are complete, select the check mark in the bottom right hand corner to complete the booking.
We want to make the booking process as streamlined as possible -- one way we do that is through recurring bookings.