4.1 Creating a New Invoice
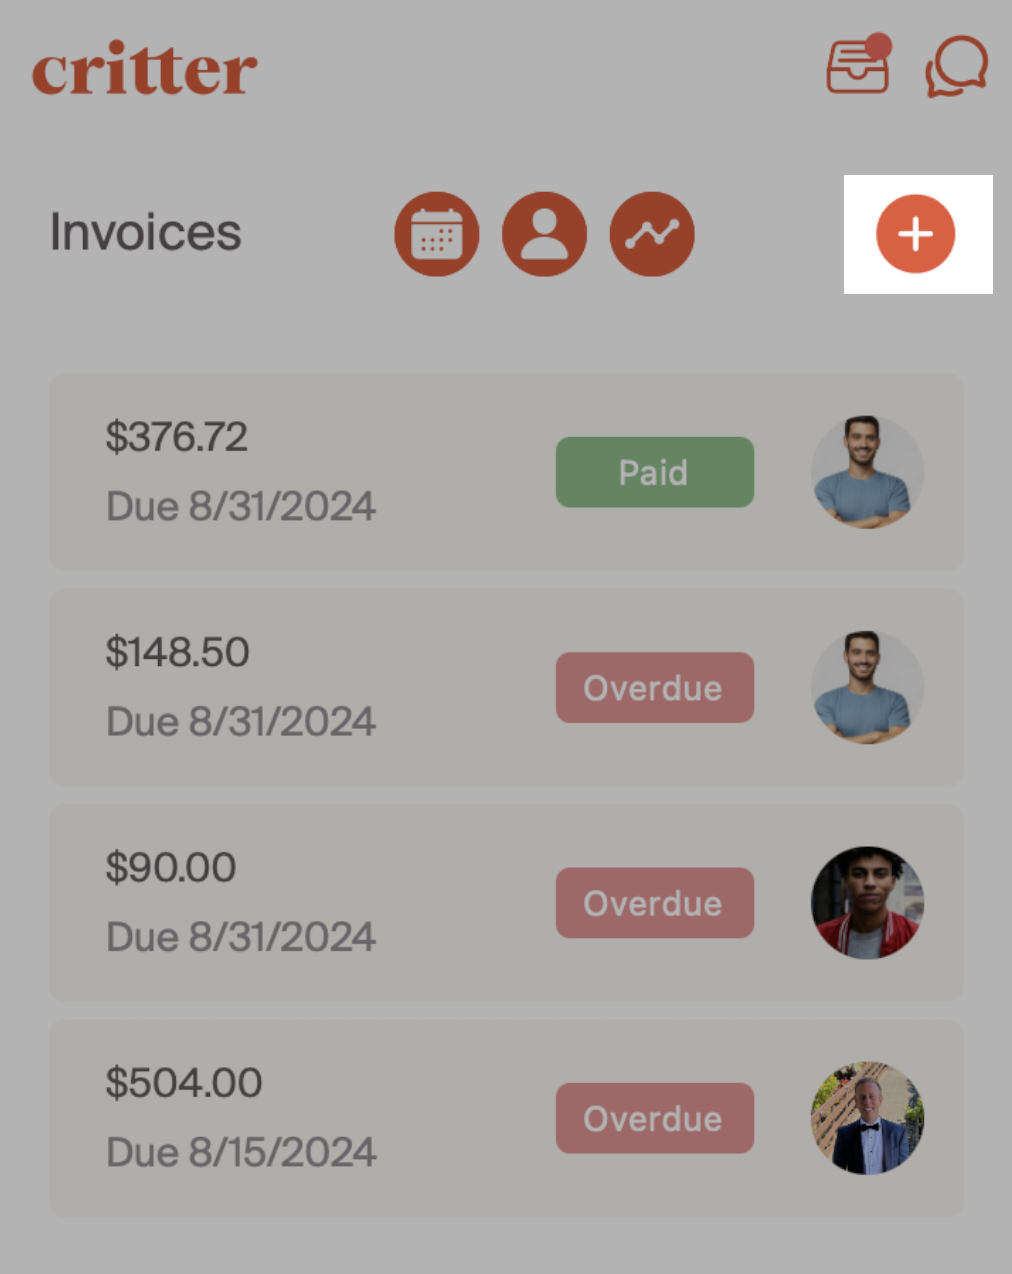
Our approach at Critter is to create invoicing capabilities that are flexible and allow you to match business processes to your invoicing approach. When you land on the invoice page, you'll first see recent invoices created, and the status of each invoice.
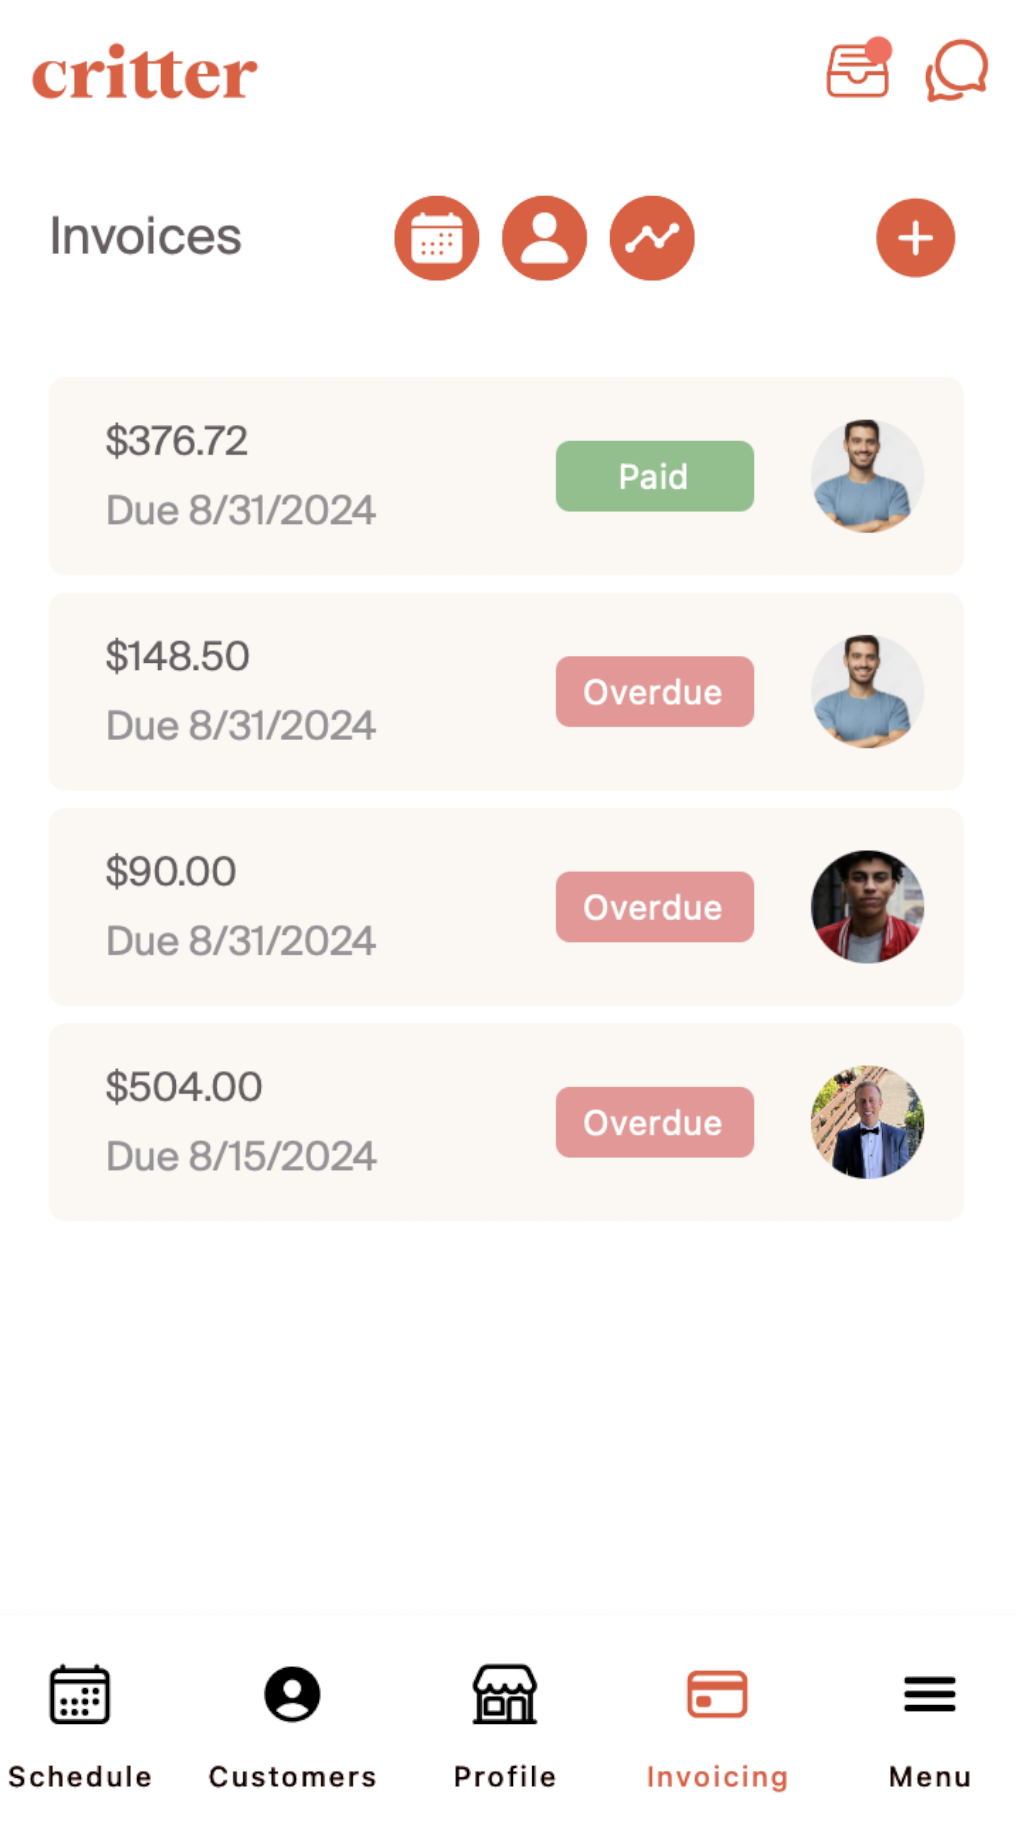
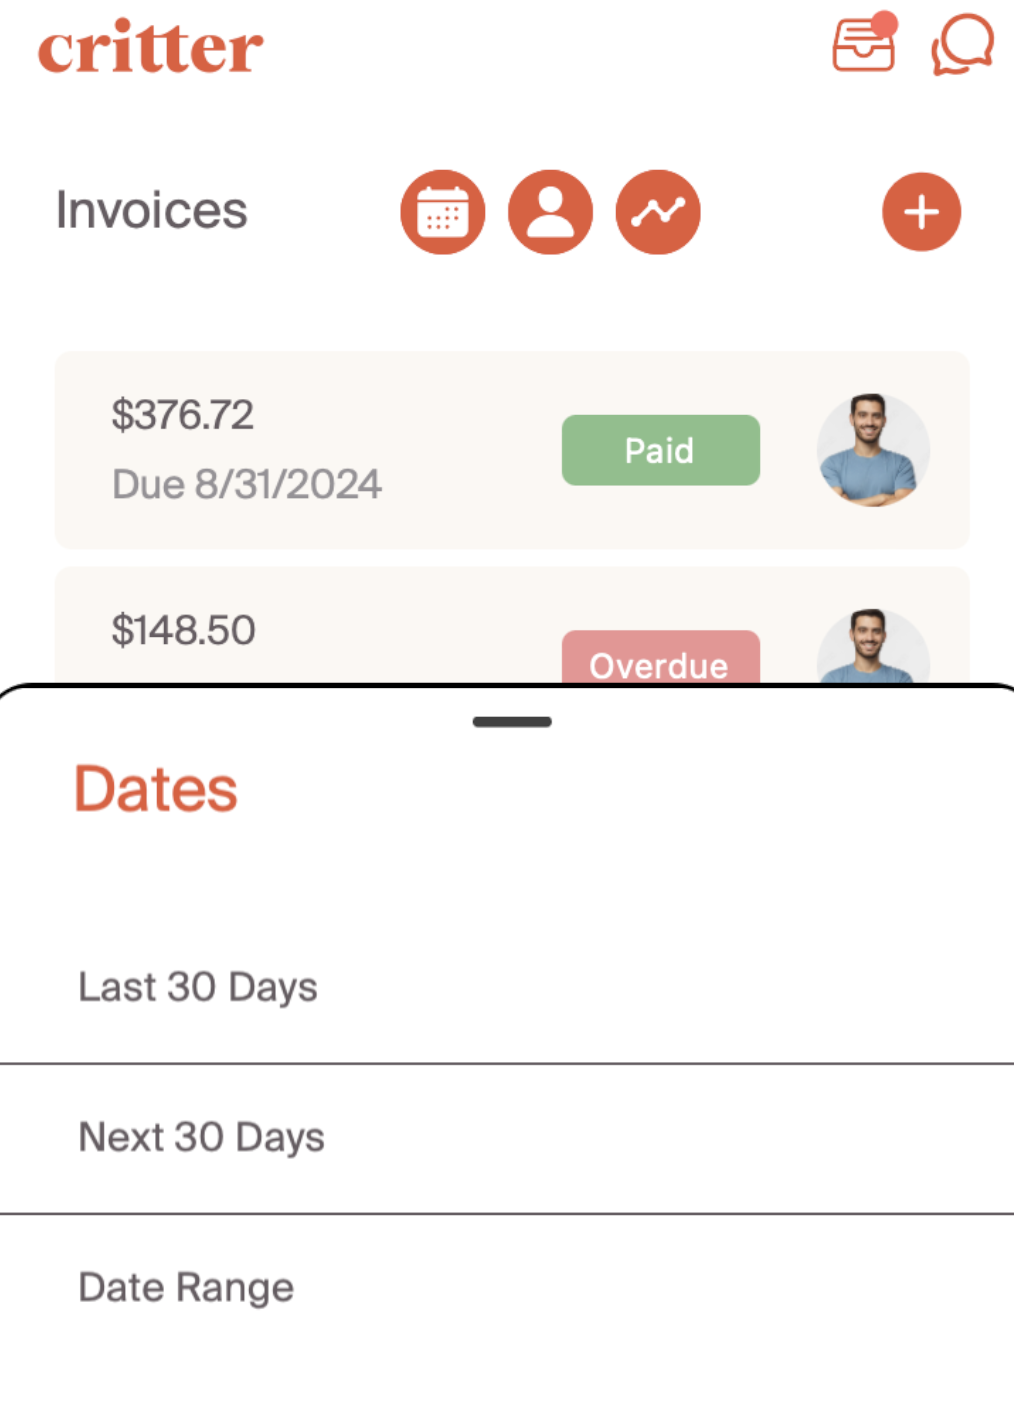
The three icons at the top allow for filtering by relevant criteria. The 'calendar' icon on the left allows for filtering by date. We provide quick toggles for the last 30 days or next 30 days, as well as the ability to create a custom date range.
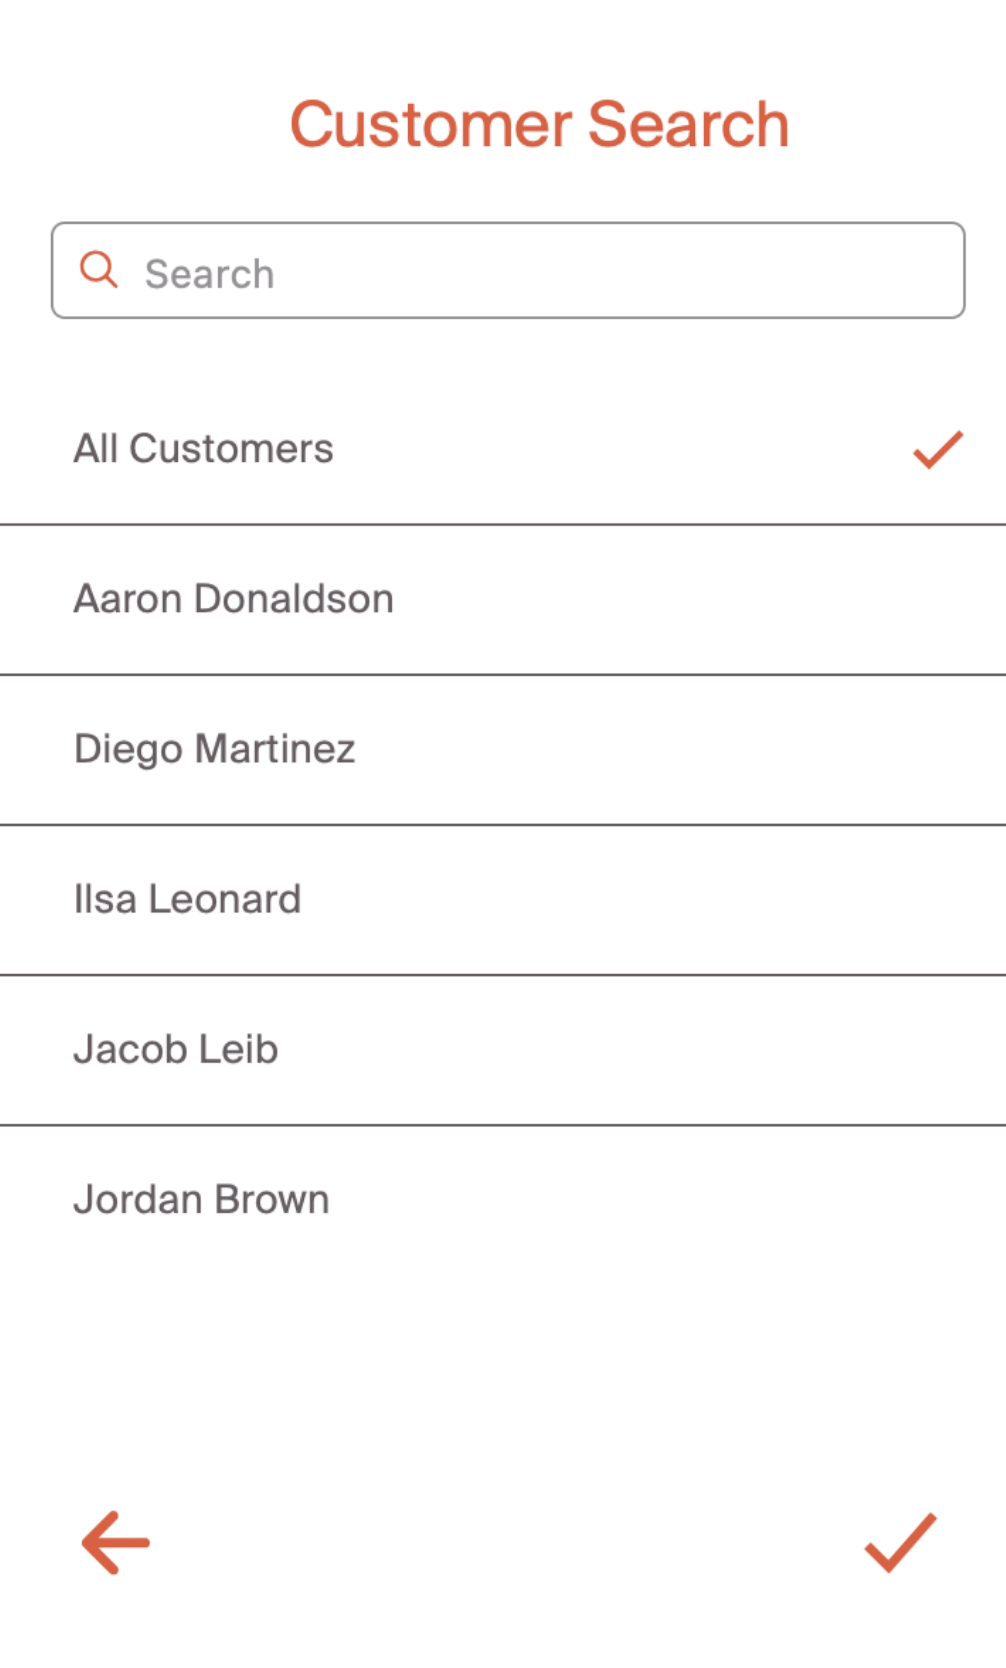
The middle 'person' icon allows for filtering by customer. You can search for a specific customer, or select from the drop down list.
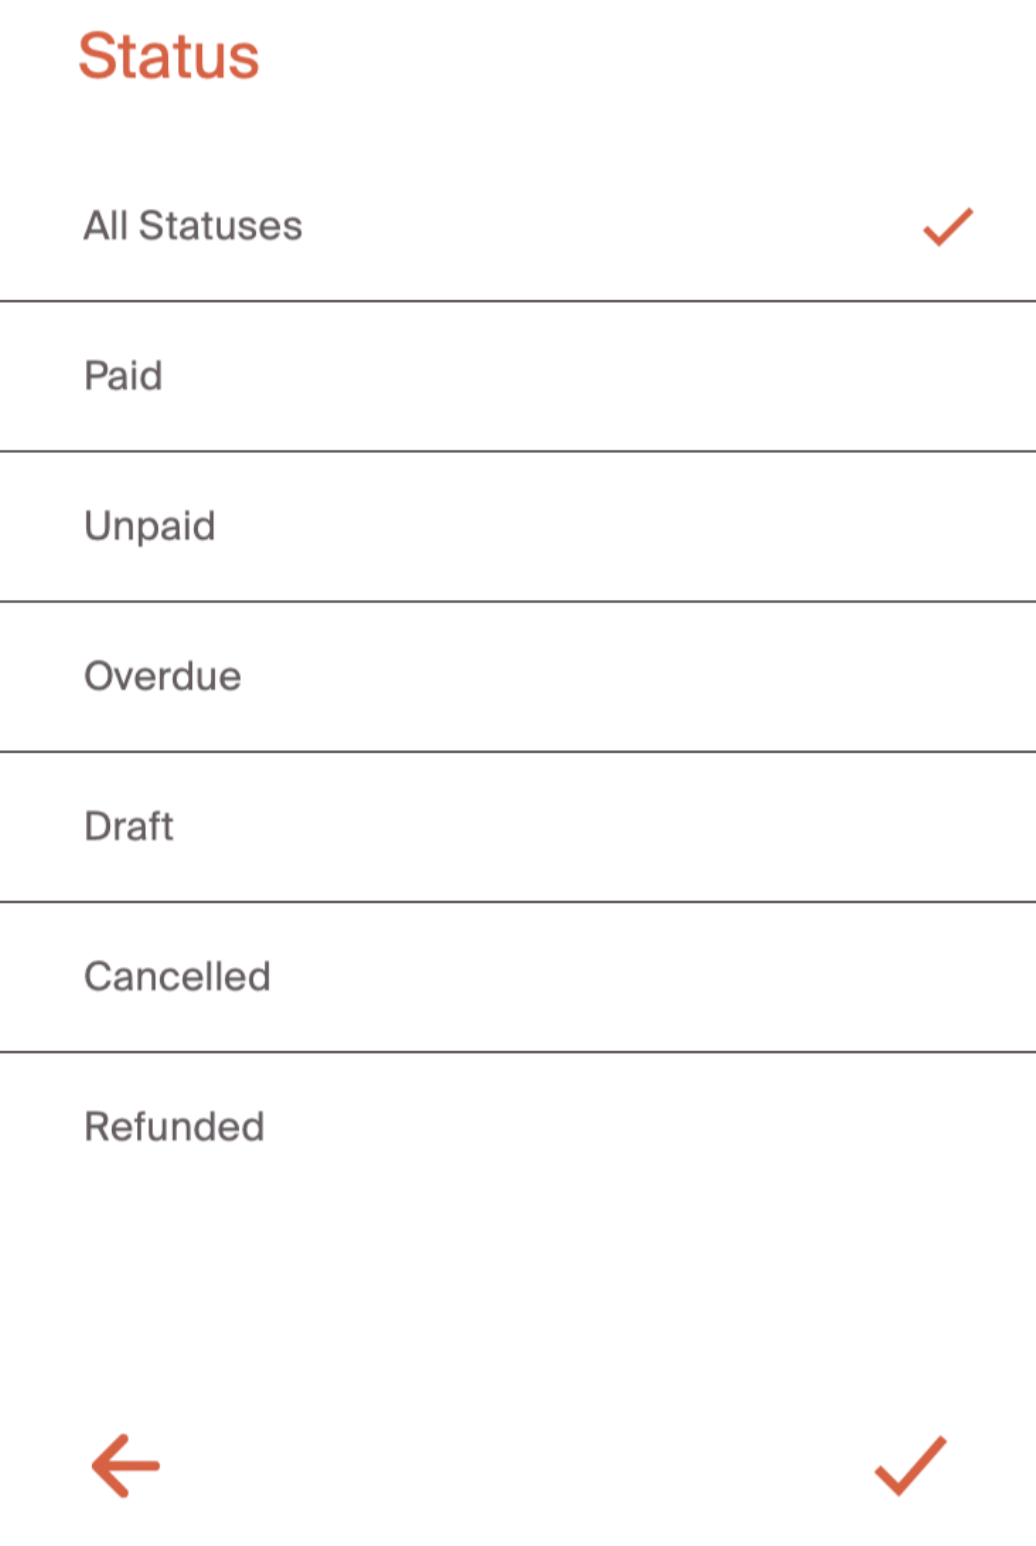
The 'graph' icon to the far right allows for filtering by status. These statuses are shown below.
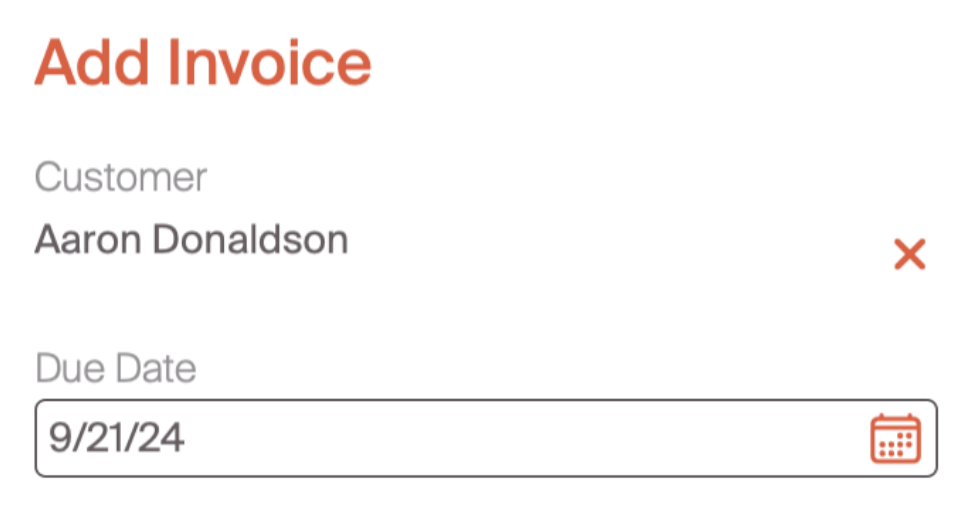
Creating a new invoice is done by selecting the "+" icon in the upper right hand corner of the invoice tab.
When a professional select's the "+" icon, they're presented with a new invoice. The first step of an invoice is to select the customer, and include a memo. We do require a customer be assigned to an invoice, so customers must be created prior to this step. As mentioned, the due date is flexible and determined by the professional. This can be before services occur, on the date that they occur, or any time period in the future. These are the only two mandatory steps in the process.
Now that we know how to navigate and create a new invoice, let's walk through linking invoices to bookings.